Add a staff member and their hours
Each person who takes appointments gets their own profile and weekly schedule. Customers pick who they want when they book.
Add the person
- In the sidebar, open Staff.
- Click New staff member.
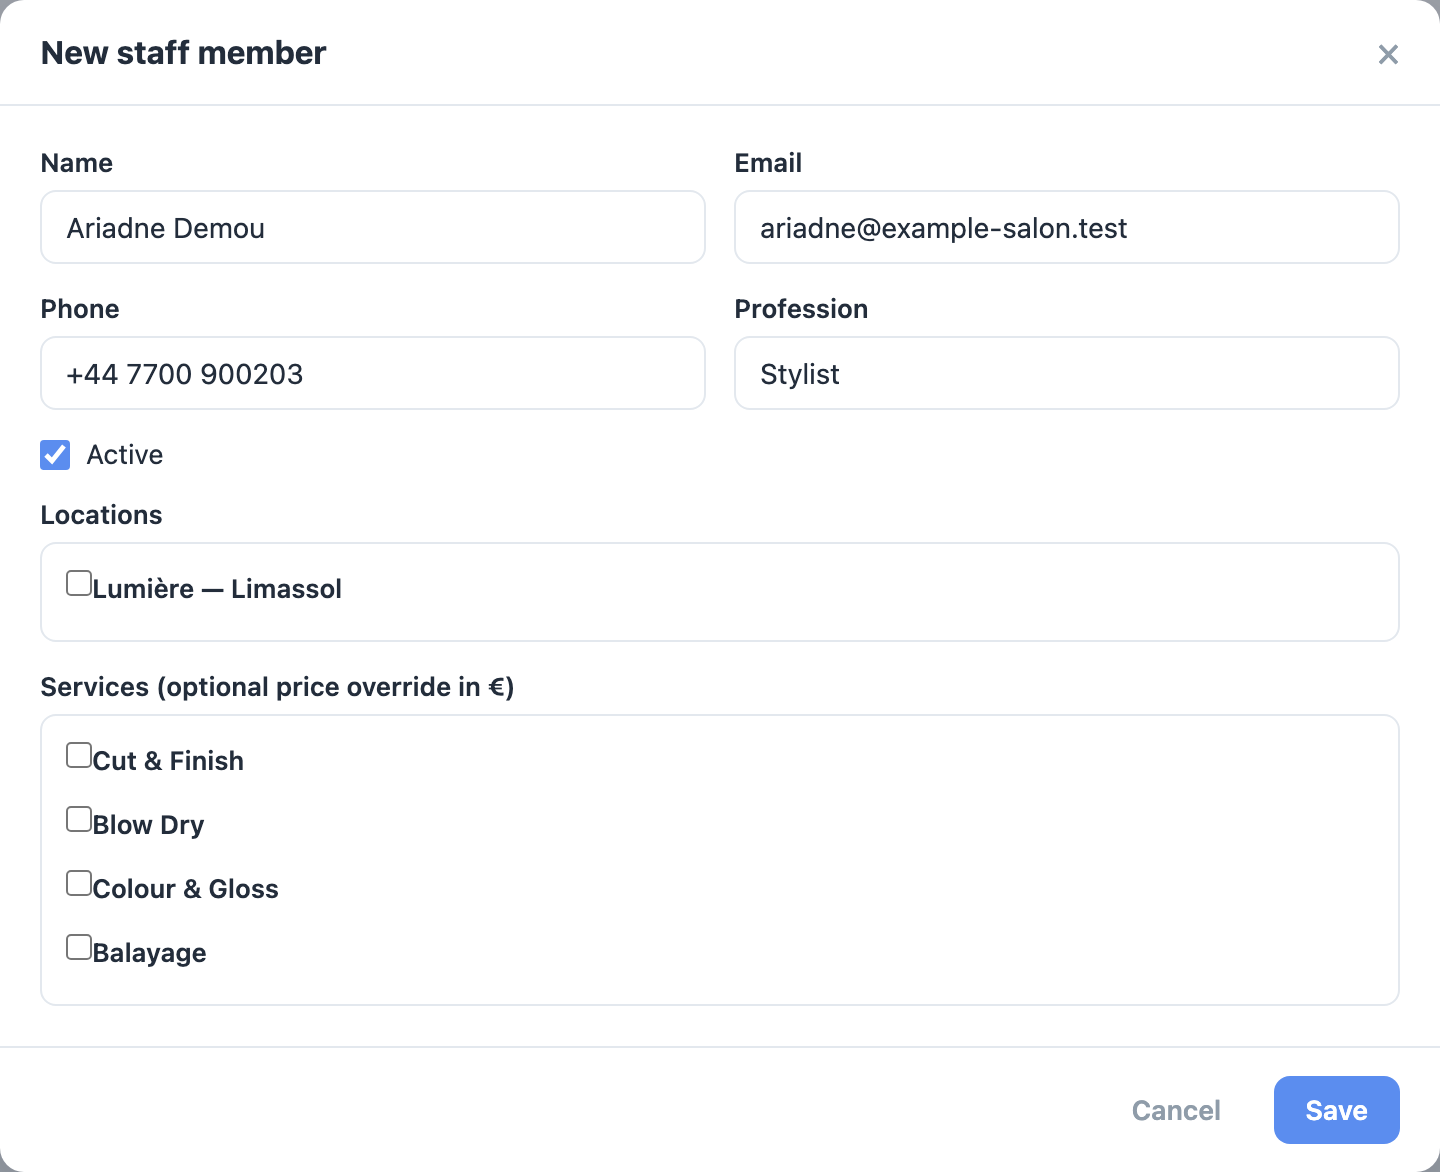
- Enter their Name — this is what customers see when choosing who to book.
- Add Email and Phone if you have them, and a Profession (for example "Hair stylist").
- In Services (optional price override in €), tick the services this person offers. A price next to a service is only needed if they charge differently from the service's normal price.
- Click Save.
Set their working hours
- In the staff list, click Schedule on the person's row.
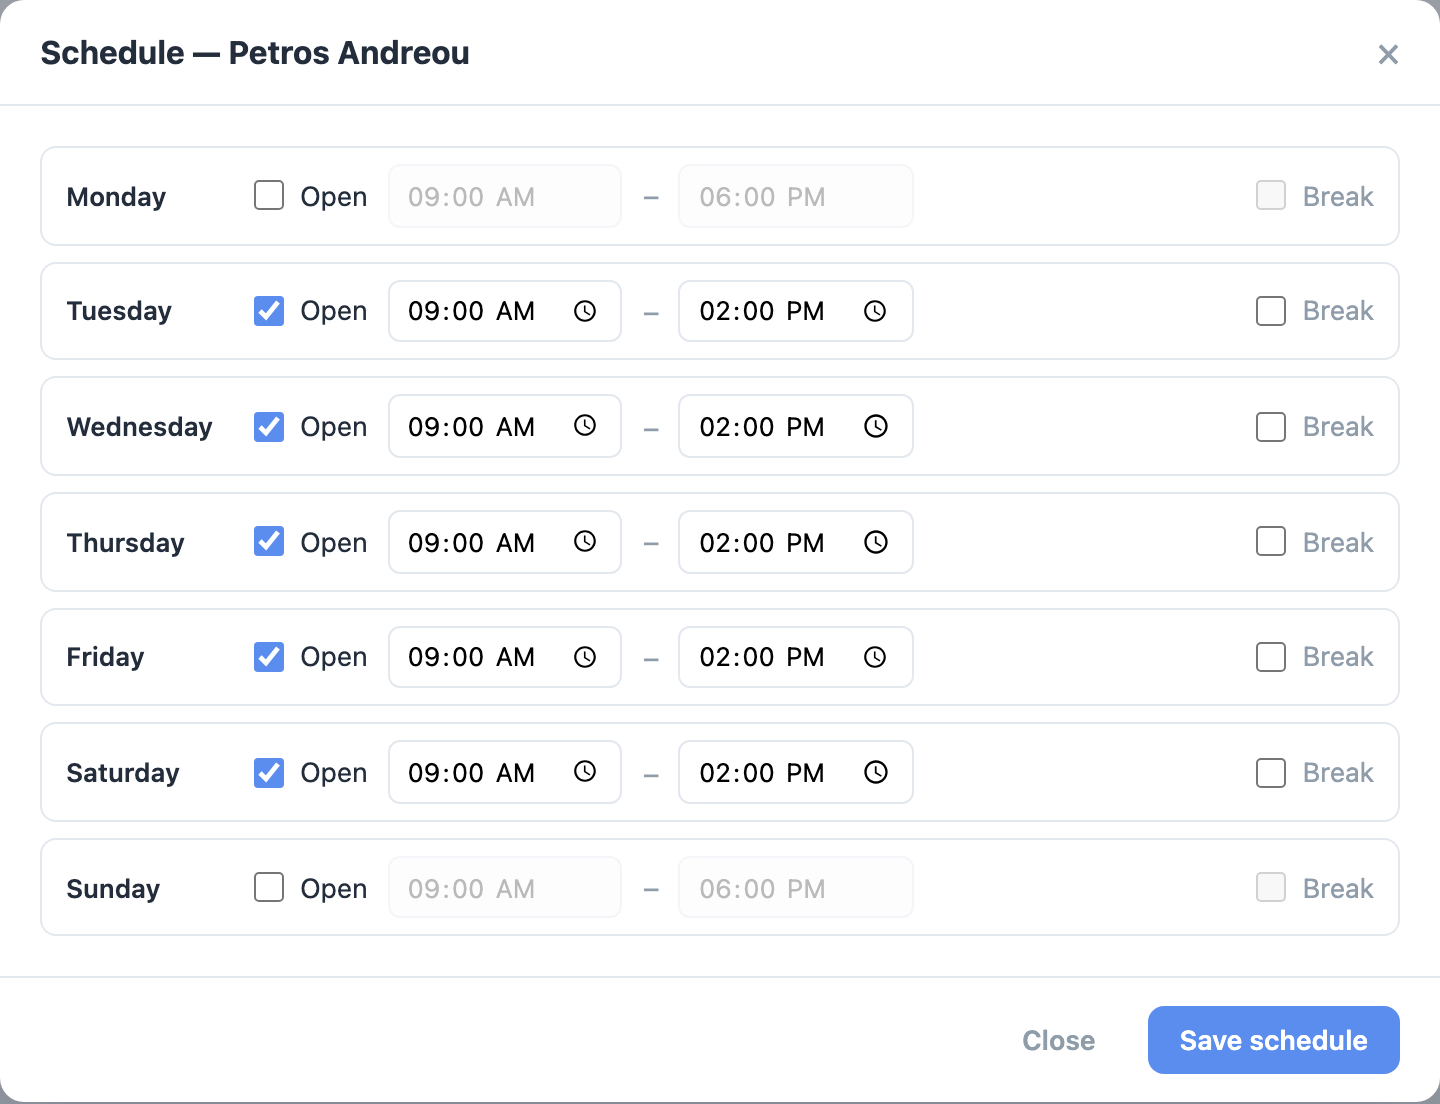
- Tick Open on the days they work and set start and end times. Add a Break where needed.
- Click Save schedule.
Give them their own login (optional)
- Click Login on the person's row.
- Enter an email and a password for them, then click Create login.
- They can now sign in to the dashboard themselves. As the dashboard puts it: they will only see their own appointments — and they cannot change workspace settings.